Integrating V-REP with RoboComp as an external simulator and as an in-the-loop simulator
July 22, 2019
| [](https://nodesource.com/products/nsolid) |
Goals:
### Convert scene files of RoboComp written in XML to .ttt scene file types supported in V-REP
- The scene files (like simpleworld.xml) of RoboComp are in .xml format, so, our goal is to convert these xml file to the filetype supported by V-REP.
- V-REP supports binary file format with .ttt extension.
- Advances:
- Asked the concerned question in V-REP forum: XML/text to .ttt(binary files) supported by V-REP. The following are the methods suggested to convert existing xml files into ttt file:
- V-REPs SDF plugin can be used in some way, since, V-REP can import SDF files (which are basically XML files conforming to the SDF specification) via the SDF plugin.
- We can write some simple XML importer via an add-on function. With the help of an add-on function that ships with V-REP: vrepAddOnFunc_minimalisticImporter.lua Then we can use a Lua XML parser (preferably a pure-Lua, such as SLAXML for instance).
- Asked the concerned question in V-REP forum: XML/text to .ttt(binary files) supported by V-REP. The following are the methods suggested to convert existing xml files into ttt file:
Validation test of the V-REP integration
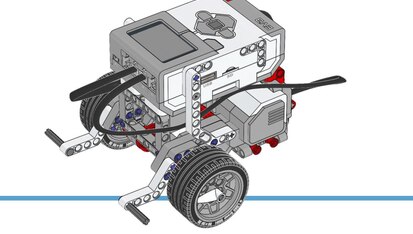
### The idea is to use the Lego EV3 as the target robot in V-REP, a simple 2mx2m planar space with walls and a line drawn on the floor so it can follow it.
- For the testing, we required V-REP model of Lego EV3 robot. We found two model files for the Lego EV3 robot:
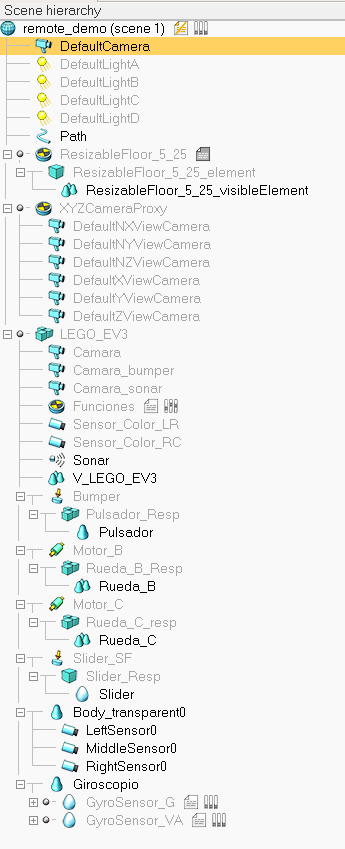
- Using the LEGO_EV3_MERGE model file, the following scene hierarchy was created in the V-REP scene:
- And, the following is the sped up demo of the Lego EV3 robot being controlled by controller to follow a line on the floor:
Documentation
### To guide the developers on how to use V-REP Remote API to control the behaviour of the scene:
- Advances:
- Here, is the basic introduction to V-REP, and a tutorial on V-REP Remote API:
Create a controller using RoboComp bridge components to control a EV3_Lego
-
The component has a DifferentialRobot interface (see DifferentialRobot.idsl on robocomp interfaces). The component also has all of the necessary methods to implement the interface successfully.
-
For testing, the EV3_LEGO robot is used with the following V-REP model-types:
-
The following are the components that makes up the model:
__COMPONENTS = { 'robot': 'LEGO_EV3', 'camera': 'Camara', 'camera_bumper': 'Camara_bumper', 'camera_sonar': 'Camara_sonar', 'sensor_color_LR': 'Sensor_Color_LR', 'sensor_color_RC': 'Sensor_Color_RC', 'sonar': 'Sonar', 'bumper': 'Bumper', 'motor_b': 'Motor_B', 'motor_c': 'Motor_C', 'slider': 'Slider_SF', 'giroscope': 'Giroscopio' }- The robot has two motors named “Motor_B”, and “Motor_C” which are used to control the movement(rotation and translation). And, it also has two sensors for sensing the surroundings.
-
The V-REP scene act as a Server and the corresponding client logic is implemented in vrep_client_controller.py. This is the code snippet to initialize the client in robocomp component to connect to V-REP server:
class VRepClientController: def __init__(self, host, port): self.host = host self.port = port self.client_id = -1 self.console_id = -1 self.debug = False self.connect() if not self.is_connected(): if self.debug: err_print(prefix="COMPONENT CREATION", message=["CANNOT CONNECT TO REMOTE API"]) raise Exception("CANNOT CONNECT TO REMOTE API") -
remote_demo.ttt is the V-REP scene file for testing the robot.
-
EV3_LEGO_controller is the python file containing the functions used to control the robot.
-
The compute function in specificworker.py has the logic for the robot to follow a line in the scene. This file basically calls the function in the file EV3_LEGO_controller to control the robot.
Nikhil Bansal